Saturday, April 7, 2012

Happy Easter

Hope that everyone is having a great holiday weekend and you are taking the time to remember the One that gave His life for us. I snapped a few pics of some Easter around our home. Did not do much decorating this year except for the wreath posted hear and this:

A bunny given to me by a friend.  I just love him!!


Spanish moss and faux eggs


HAPPY EASTER!
Linking to: Flaunt It Friday The Shabby Nest French Country Cottage Kristen's Creations

Saturday, March 24, 2012

New Kitchen Faucet

I just installed my first kitchen faucet! ( I did swallow my pride and accept help from my husband AFTER I spent 2 hours removing the old one, he had a really long day that involved a very important presentation and the last thing he wanted to do was get involved with this!) When he came home I was on my back under the sink clanging away, not your typical "Welcome Home Honey" scene. Ha! I am not going to really write a tutorial on this but will say that YOU CAN DIY this but before we were finished I was wishing that I had a plumber on speed dial!  It's all about having the right tools.  A basin wrench would have come in handy removing the old bolts because they were in such a tight space, instead I used 2 crescent wrenches. Really the new faucets are not that difficult to install.  I YouTubed the installation but it only took him 3 minutes(ha) as opposed to my 4 hours! Here are my before and after pictures.

The Old:


These are the jokers below that require 2 wrenches to remove. They attach to the water supply.


The New One!!! Yay!!!!!!


We went with a Delta model because the pull down sprayer has a magnet that keeps it attached to the body and I have seen some that over time may not continue to say up in the spout .


Not sure what happened here but I wanted to show you the bottom of the sprayer. It has two settings that you will see below.


I must say that this project gave me a great sense of accomplishment but I am not so sure I would repeat it.  It might have been easier to have replaced the sink at the same time!  Anyway I am lovin it!

Thursday, March 22, 2012

Coffee Anyone?

Our aunt happened to mention that she was about to haul off her older furniture to Gateway and immediately my heart skipped a beat......I repeated what she said to make sure I heard her clearly. You have to understand anything this lady owns has been WELL taken care of, she vacuums everyday!!! You could eat off of her floors on any given day. Also, my daughter is moving in an apartment in the fall at college so I have been scavenging items for her. The short version of this story is we got a sofa for my daughter, Regan, a recliner for the other daughter's boyfriend and a coffee table for me!! The table had some nicks in it so I used Plaster of Paris to make my own chalk paint. I used 1/3 Plaster of Paris to 2/3 paint(left over from painting the trim of our house). With this paint it was so easy to distress with sandpaper. I sprayed it with a clear top coat that I hope will keep it from easily being scratched. Folks you can't beat free!!!! Got so excited about painting that I forgot to take a before pic:( These were taken BEFORE I waxed it.
Linking to: Furniture Feature Friday Home And Family Friday Frugal Friday Flaunt It Friday The Feathered Nest Kristen's Creations Between Naps On the Porch
HOG

Spring Is In The Air!

I just wanted to share my wisteria vines with you. I wish that you could smell me, they are amazing!!! I am trying to get the yard in shape slowly but surely. I have to get my self in gear due to a wedding shower I am hosting in June. Can you say motivation with a capitol M? I hope to keep you posted on my home improvement projects leading up to the party.  Why is it that the animals always want to get in the pictures????


Gerber Daisies


My knock out rose bush is beginning to bloom

Tuesday, March 20, 2012

Easter Wreath


My Spring Break is coming to an end and naturally I tried to get everything done today(Saturday) that I intended to do all week. I probably will not be able to raise my arms tomorrow! I looked at Kristen's Creations' tutorial to use as a guideline. I just love her style. Mine is not as full as hers but I am happy with the results. One thing that I changed is that I did not us the 21 inch mesh, I used three different colors of the 4 inch mesh. I like it because it does not fray like  the wider mesh.  The more I look at this the more I want to add more to it but not making another trip to Hobby Lobby in the near future! Maybe next week.

He IS Risen!!!

Linking to:: Elizabeth & Co: Be inspired

                   Metamorphosis Monday Kristen's Creations Southern Hospitality Spring Party

Saturday, February 25, 2012

Roman Shades

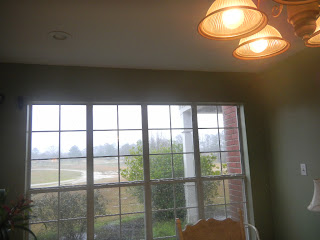
This post has been 2 months or more coming. I have been wanting to make roman shades for quite some time but I watched way too many youtube videos before making the first move except for the purchase of the fabric 2 months prior to the first stitch! I have a GREAT fabric source in Boga Chitto, Mississippi at a place or places, should I say ,called The Cotton Patch. They have small buildings of bolts and bolts of fabric at ridiculous low prices! They also have ribbon, tassels, and any type of fringe you can imagine. I must say that I learned so much during this project. It is one of those projects that by the time you really know what you are doing, it is finished! Roman shades are quiet simple but I over thought this one. The best tutorials that I followed are here and here.   The second link is great for ordering the hardware. She also has the wonderful idea of using Velcro to attach the shades to the board.  My window was so big that I had to order the plastic dowels from her.  Also, the first link recommended sewing the sides and bottom of the lining together and this is what I did but in hindsight I would sew only the sides together and hem the fabric and lining separately to eliminate pucking.  Anyhoo, I FINALLY completed them and yes, I made mistakes but I had rather learn on my own projects than with someone else's money. Here are the before pics of the breakfast room without a window treatment.
After:
Without the valance


Valance added, I used a 1.5" PVC pipe that I painted on the ends to reutilize the holders I already had mounted for something I had previously hung.  I hope to in the near future add fancy pulls to the cords and something on the end of the pipe.


I am really hoping to save energy with the addition of these shades.  I have never covered these windows but there has always been a considerable difference in temperature in this room.  I also have a small window to the left of this large window that I made a shade for but did not get a picture of it.
I hope this inspires you to make this if you have contemplating this project in the past.

Linking to:   

Chic on a Shoestring Decorating
The French Country Cottage


Share Your Creations